A4 and Letter label printing
Start where the unused labels begin.
Bring the paper size, label size, quantities and starting position into the same print preview. Prepare sheets or use one label per page for a matching label-printer setup.
For Windows. English-language interface.
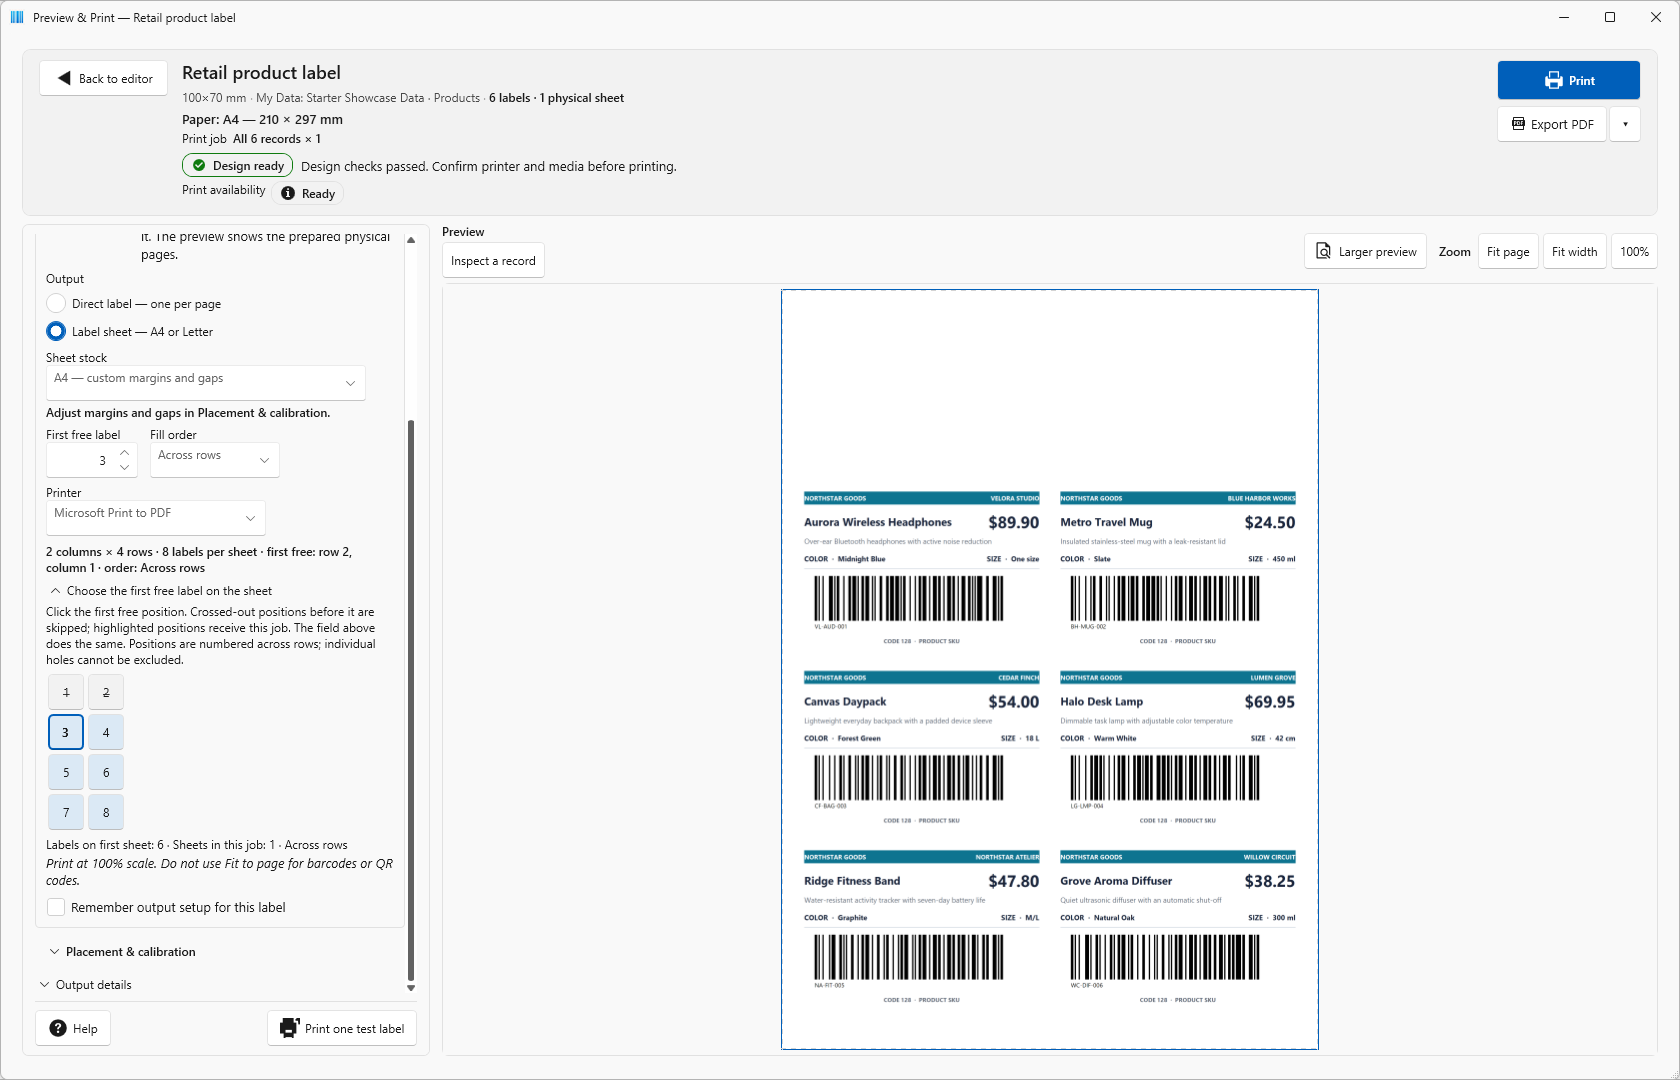
Match the stock before you print.
A4 or Letter defines the sheet, not the individual label.
Choose the label dimensions, then set the margins and gaps to match the stock in your printer. Review the resulting number of rows and columns.
The preview shows prepared physical pages, and the job summary keeps the number of labels and sheets separate.
Label dimensions
Set the width and height of each label.
Margins and gaps
Match the outer spacing and the spaces between labels.
First free position
Choose where this job begins on the first sheet.
Make the starting position visible.
Choose First free label or use the sheet diagram. Earlier positions are skipped; the job continues through the following positions in the chosen fill order.
This chooses the start of a continuous run. It cannot skip arbitrary individual holes. Check every position the job uses, including those on later sheets.
Only reuse a partly used sheet when your printer and label-stock instructions allow it.
Label quantities
Choose how many labels each record needs, or how many identical copies to place on a sheet.
Repeat the entire print job
This is a separate printer setting. The preview and exported PDF contain one prepared job, without extra driver repeats.
Refine placement without rebuilding the design.
Use printer offsets to move the prepared output left, right, up or down. Reset offset returns the correction to zero. An alignment test helps you compare the output with your physical stock.
The outer margin positions the label grid. Text and barcodes have their own positions inside each label, so the first printed mark is not necessarily at the grid boundary.
If the output would extend beyond the paper, correct the setup before continuing.
Keep the design. Check the next sheet. Remember output setup can retain supported paper and printer settings. First free label is not saved: check it for the physical sheet you load next.
Choose the output you need.
Label sheets
Prepare A4 or Letter pages with the selected margins, gaps, fill order and starting position.
One label per page
Use Direct label for a page matching the label dimensions, with a compatible Windows printer driver.
A complete PDF
Export and inspect every prepared page. In the PDF print dialog, use matching paper and Actual size or 100%.
Preview zoom does not set print scale. Fit page makes the screen preview easier to see. Fit to page in a PDF print dialog can change the printed label and barcode dimensions.
Prepare the next print run with the layout in view.
Choose the labels, check their positions and test a sample before the full batch.
For Windows. English-language interface.
See current price and license terms in Microsoft Store.