SendMailer Pro tutorials
Import contacts from Excel, personalize your message and prepare a document for each recipient. Follow the written example with practice files, or choose a video for a specific task.
From Excel contacts to personalized emails and PDF attachments
Follow two fictional contacts from a spreadsheet to an email preview, then reuse their data in a personalized document attachment. First complete the template exercise without a sending account. The optional campaign steps require an account already configured in SendMailer Pro.
1. Import contacts from Excel or CSV
Download the Excel and CSV practice files (ZIP, 6.3 KB). Extract the ZIP and open the README. The two rows use reserved example.com addresses for preview only.
| First Name | Company | |
|---|---|---|
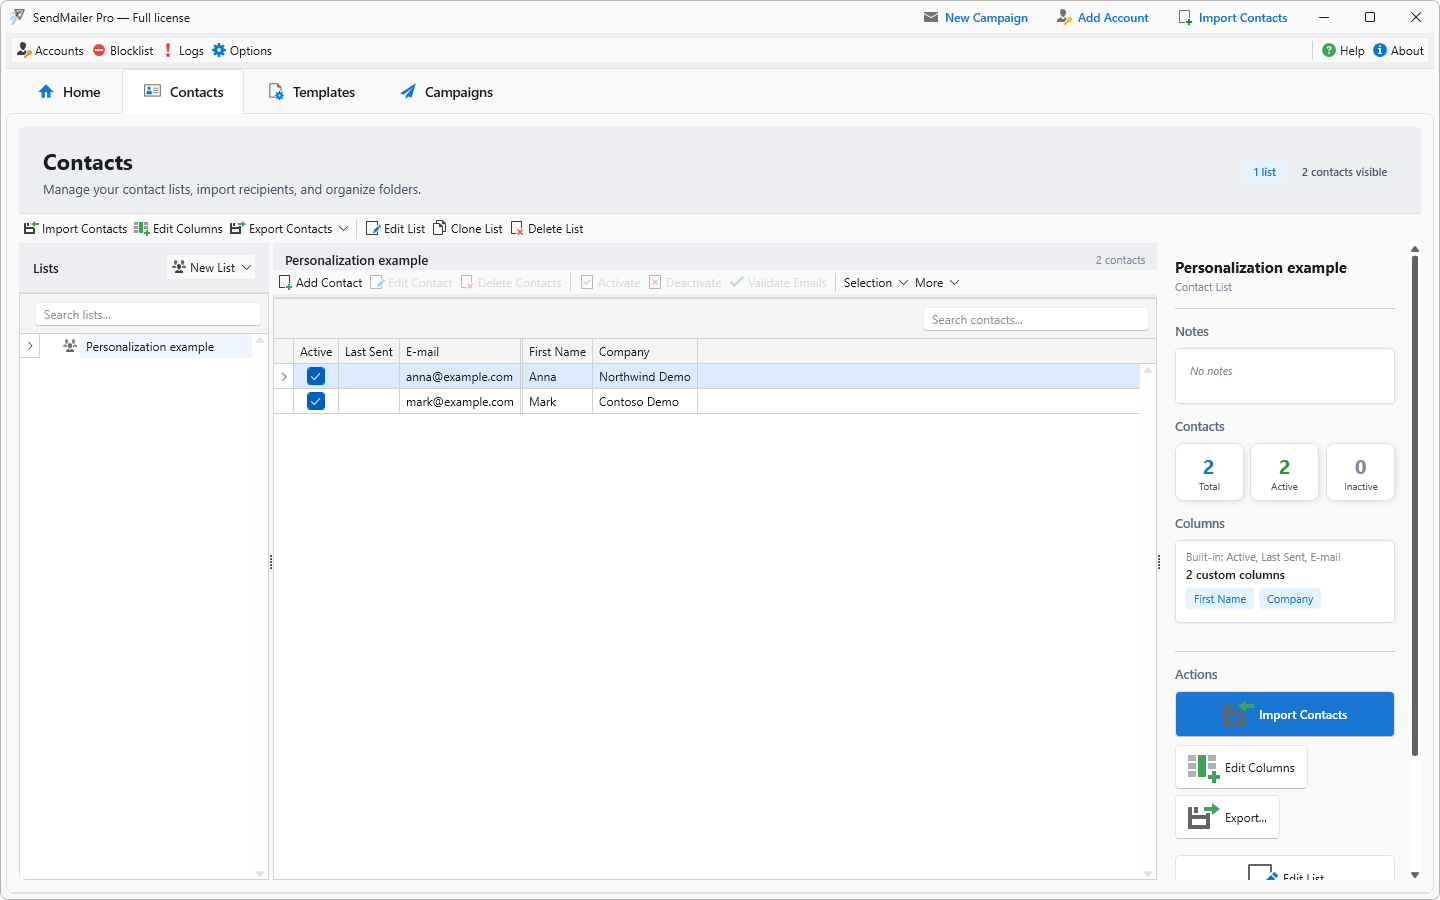
| anna@example.com | Anna | Northwind Demo |
| mark@example.com | Mark | Contoso Demo |
- In Contacts, choose New List and name it “Personalization example”. Select the new list, choose Import Contacts, and open contacts.xlsx. The CSV version contains the same data.
- Select cells A1:C3, including the header row and both contacts, then choose Import Selected. Answer Yes when asked whether the selected columns contain headers.
- Drag Email from the imported columns on the left onto E-mail on the right. Select First Name on the left and choose Map selected column and add to contact list; keep the suggested name and choose Ok. Repeat for Company, then confirm the completed mapping with OK.
- Check that both contacts appear. If they are inactive, choose Selection → Select All → Activate and confirm the two selected contacts. The template preview uses active contacts.
2. Insert real merge fields
- Open Templates, choose New Template, enter a name and confirm it. Select the template and choose Edit Template. If a blank template offers an email layout, choose No for this simple text example.
- At the bottom of the editor, open Contact List and double-click “Personalization example”. If Preview merged data is enabled, turn it off while inserting fields.
- Type “Hello ”, open Insert merge field and select First Name, then add a comma. On a new paragraph, type “Here is the project update for ”, insert Company from the same menu and add a period.
The template should read “Hello «First Name»,” and “Here is the project update for «Company».” Insert the fields through the menu: typing the angle brackets and field names as ordinary text does not create merge fields.
3. Preview both contacts
Enable Preview merged data. Use First record and Next record to inspect both contacts. In this example, the same template produces:
| Greeting | Company |
|---|---|
| Hello Anna, | Northwind Demo |
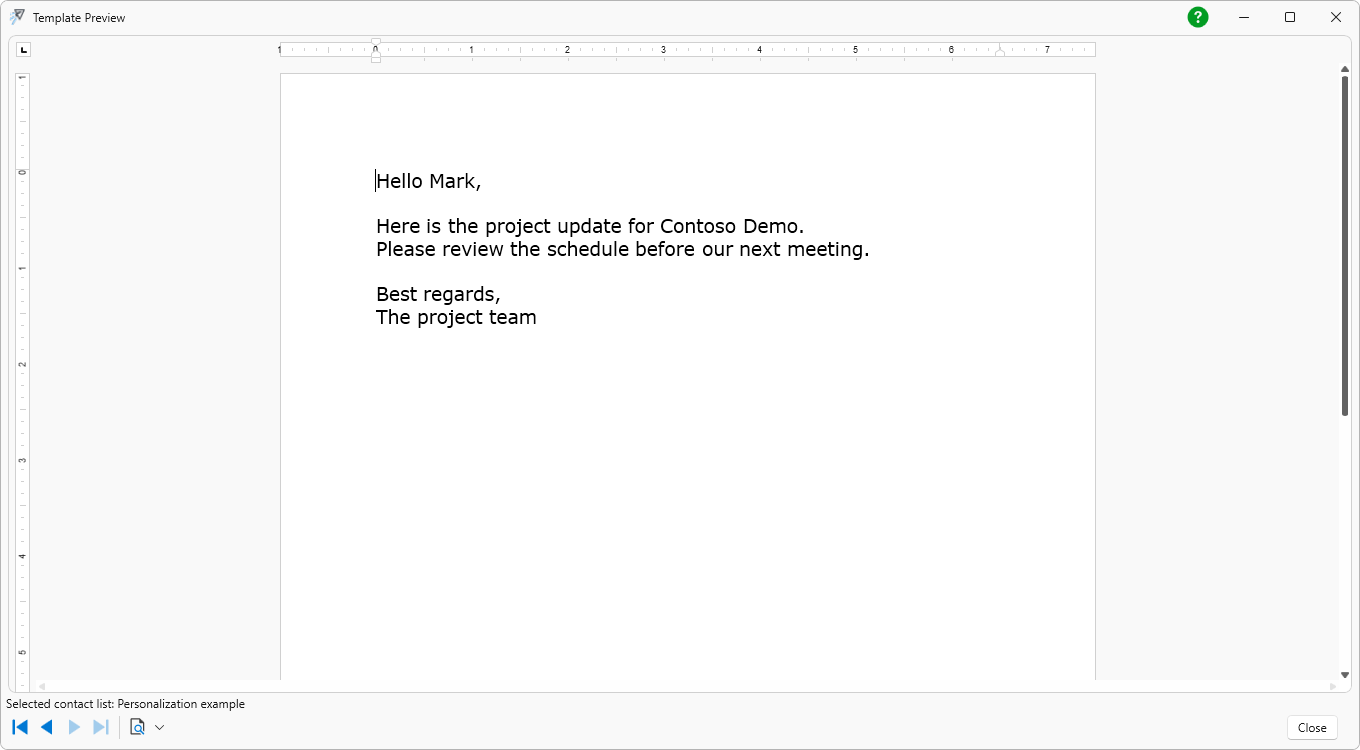
| Hello Mark, | Contoso Demo |
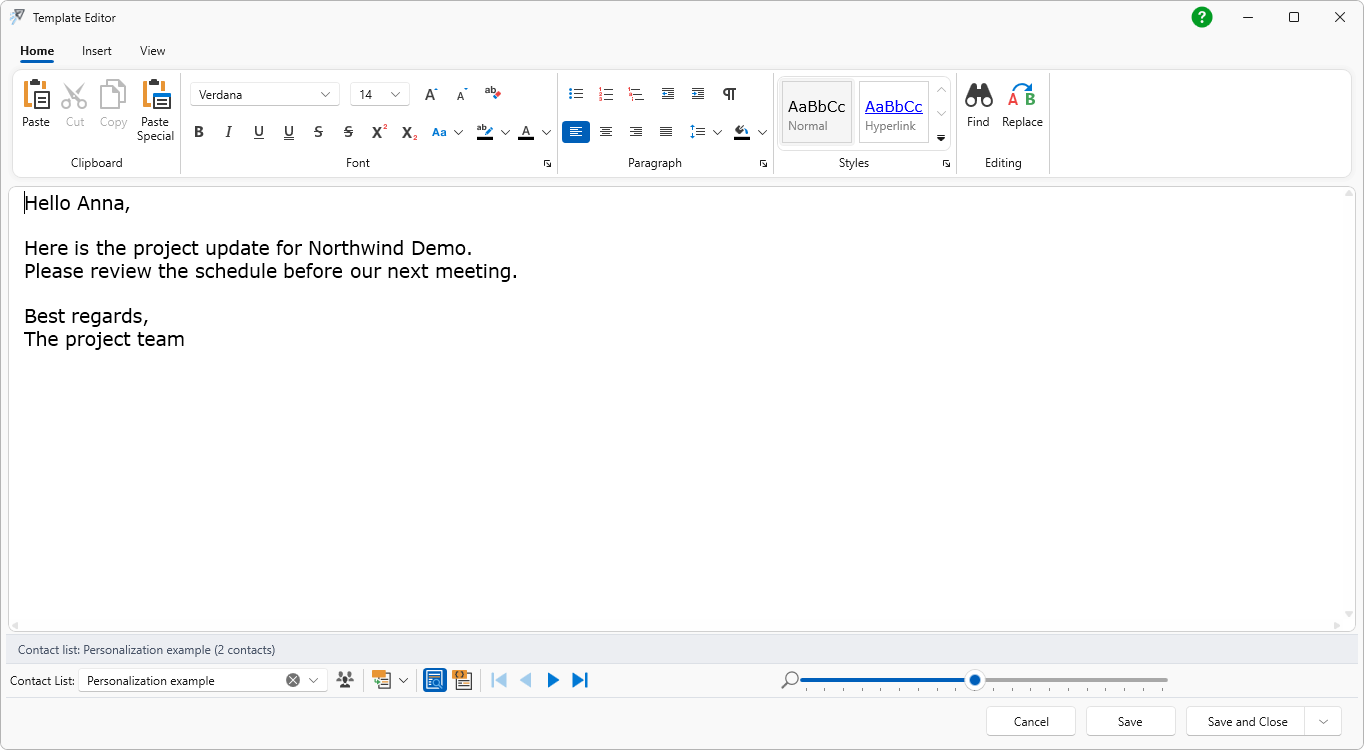
Choose Save and Close. When you reopen the template, its merge fields remain available for reuse. Select the contact list again when you want to preview its data.
If the editor says “no active contacts”, check the selected list and its Active column. If it reports missing merge fields, compare the field names in the template with the columns in that list. For an empty value, check the corresponding contact’s data.
The template exercise stops at preview and does not require a sending account. Continue below when you want to prepare a personalized document attachment for a campaign.
4. Add a personalized PDF attachment
A dynamic attachment uses a template and replaces its merge fields for each recipient. For this exercise, reuse “Personalization example” to check the same name and company in a document. In your own work, you can prepare a separate document template for a project update, confirmation or welcome pack.
- In Campaigns, choose New Campaign. Select your contact list and email template, then assign an account you have already configured.
- At Step 4 — Add Attachments, open Add attachment and choose Add dynamic PDF attachment.
- Select the saved template and choose Select. Check that the attachment row shows Dynamic Pdf and the .pdf extension.
- Select the attachment and choose Preview selected attachment. Use Next Record to inspect both contacts, including names, company details and page layout.
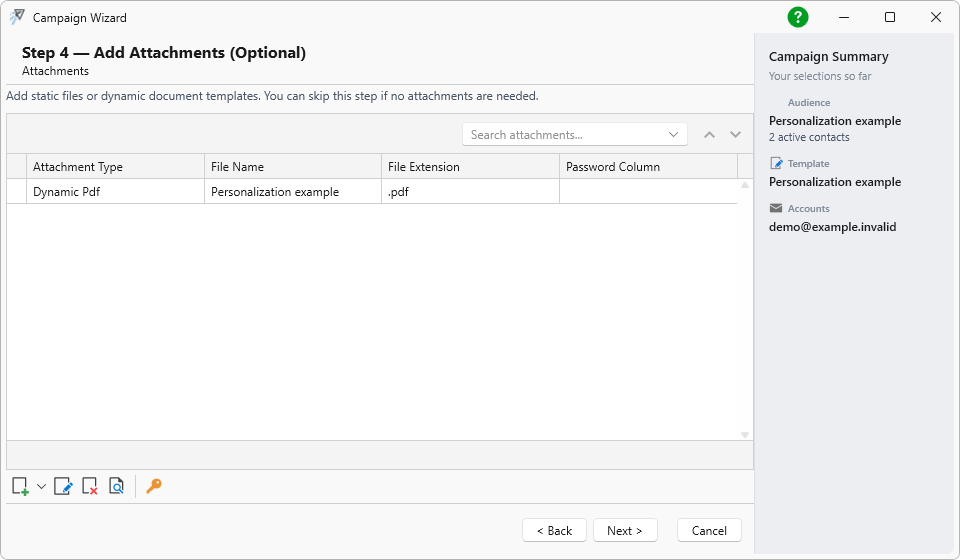
Choose the attachment type for the job. Add attachment from file attaches the same existing file to every recipient. Dynamic PDF, Word and text attachments generate recipient-specific content from a template. This workflow does not select a different existing file from a path in each spreadsheet row.
5. Review before sending
- Check the selected list, active contacts, template, subject and sending account.
- Preview both the email and each dynamic attachment. A correct email preview does not replace checking the document layout.
- Resolve missing fields and empty values in the contact list. Keep the field names consistent across the email and attachment templates.
- For your own campaign, send a test to an address you control and verify the received message and attachment before sending to your intended recipients. Follow your provider’s sending limits.
The downloadable sample is for preview only. Replace its reserved addresses with your own test data before sending. For account setup, follow Adding Email Sending Accounts; for the full campaign workflow, see Creating and Sending an Email Campaign.
Watch the template walkthrough
Video tutorials
Watch on this page after choosing the required cookies, or use the direct YouTube links.
01. Adding Email Sending Accounts
4:24
Learn how to add and configure email sending accounts in SendMailer Pro, including standard SMTP accounts and Microsoft Outlook or Microsoft 365 sign-in.
To watch here, enable Functional, Analytics and Advertisement cookies in Cookie preferences, or use the YouTube link.
02. Creating and Managing Contacts
3:32
Learn how to create and manage contact lists in SendMailer Pro and prepare recipient data for personalized email campaigns.
To watch here, enable Functional, Analytics and Advertisement cookies in Cookie preferences, or use the YouTube link.
03. Creating personalized email templates
3:31
Learn how to create and edit reusable email templates in SendMailer Pro and add personalized content for recipients.
To watch here, enable Functional, Analytics and Advertisement cookies in Cookie preferences, or use the YouTube link.
04. Creating and Sending an Email Campaign
5:27
Learn how to create an email campaign in SendMailer Pro, choose its contacts and template, preview messages and manage sending.
To watch here, enable Functional, Analytics and Advertisement cookies in Cookie preferences, or use the YouTube link.
Need a hand?
Find an answer in the SendMailer Pro FAQ or contact support.